THE DEFORMATION TOOL
Vector objects, unlike raster objects, can be deformed. You use the Text, Draw, and Preset Shape tools to create vector objects. When selected, vector objects appear surrounded with deformation handles.
Although an object on a raster layer cannot be deformed, you can deform a raster layer. Use the Deformation tool to deform a raster layer. Once you select the Deformation tool, the deformation handles will surround the layer.
- Drag the corner deformation handles to resize an object.
- To move an object, click on the center handle and drag.
- To rotate an object, click on the rotation handle and drag.
- To increase the width of an object, drag either of the side handles.
- To increase the height of an object, drag either the top or bottom handle.
- To change the perspective of an object, hold down the Ctrl key while you drag one of the corners of the object.
- To skew an object, hold down the Shift key while dragging one of the side handles.
- To distort an object or group, hold down Ctrl-Shift while dragging a corner handle.
Exercises:
Deformation -- Vector Object
This exercise illustrates using the deformation handles on a vector object.
- Open a new file.
File > New
Settings:
Width: 200 Pixels
Height: 100 Pixels
Resolution: 72 Pixels/inch
Background Color: White
Image Type: 16.7 Million Colors
- Select the Text tool and place the word DEFORM on the canvas.
Settings:
Name: Arial
Size: 26
Script: Western
Create As: Vector
Antialias: Yes
Kerning: 0
Leading: -1
Auto Kern: Yes
Color: Black
Center
Enter Text Here: DEFORM
- Experiment with the deformation handles.
Deformation -- Raster Layer
This exercise illustrates using the deformation handles on a raster layer.
- Open a new file.
File > New
Settings:
Width: 200 Pixels
Height: 200 Pixels
Resolution: 72 Pixels/inch
Background Color: White
Image Type: 16.7 Million Colors
- Create a new raster layer.
Layers > New Raster Layer
Name: Deform
Blend Mode: Normal
Opacity: 100
Group: 0
Layer is Visible: Yes
Lock Transparency: No
Mask is Enabled for the Layer: Yes
Mask is Locked with Layer: Yes
Auto Proof: Yes
- Set your foreground color to green.
Settings:
Red: 0
Green: 192
Blue: 192
- Select the Paint Brush tool.
Settings:
Paint Brush Type: Normal
Shape: Round
Size: 50
Hardness: 100
Opacity: 100
Step: 100
Density: 100
Paint Brush Options Tab
Paper Texture: None
Built Up Brush: Yes
- Place two dots on the canvas.
- Select the Deformation tool
 .
. - Experiment with the deformation handles.
MASKS
A mask is a grayscale image. You use a mask to cover part of an image or to create a fading effect. The amount of coverage is determined by the colors in the mask. Where the mask is black, the image below the mask is not visible. Where the mask is white, the image is visible. Gray produces varying degrees of visibility based on the shade of gray: lighter gray shows more and darker gray shows less.
Masks can be saved to the alpha channel or to disk and are always created in the raster grayscale mode. All the tools that work with grayscale images work with a mask, including vector tools. You can create a mask from a selection, an alpha channel, or another image.
You create a mask and the mask adjusts itself to the size of the image to which it is applied. If you need more precision, you have to create a mask specifically for the image on which you are working.
Add Mask from Image Dialog Box Options
| |
| Source of Luminance | Creates a mask based on luminance value. |
| Any Non-Zero Value | Creates a mask with no gradation. Black pixels cover completely. All other pixels are transparent. |
| Source Opacity | Creates a mask based on opacity. |
Exercises:
A Sharp Edge Mask
- Open a new file.
File > New
Settings:
Width: 200 Pixels
Height: 200 Pixels
Resolution: 72 pixels/inch
Background Color: Black
Image Type: Grayscale (8 bit)
- Set your foreground color to white. Right-click to open the recent color dialog box. Click on the color white.

- Select the Preset Shapes tool. Set the tool options.
Preset Shapes Tab Settings:
Shape Type: Circle
Style: Filled
Line Width: 1
Antialias: Yes
Create as Vector: Yes
- Move to the middle of the canvas left-click and drag outward to create a circle in the foreground color. Your image should look like the one shown here.

- Deselect the circle.
Selections > Select None
- Create the mask.
Masks > New > From Image
Settings:
Source Window: This Window
Create Mask From: Source Luminance
Invert Mask Data: No
- Save the mask to disk.
Masks > Save to Disk
File Name: circle.msk
- Close the file.
File > Close
Note: You can save the image file if you like. You might want to modify it later. However, saving the file is not absolutely necessary, because you have saved the mask
- Open the pspshgrl.jpg file. You downloaded this file earlier.
File > Open
Look in: Enter the directory in which you stored your files.
File: pspshgrl.jpg
Files of Type: JPEG-JFIF Compliant (*.jpg, *.jif, *.jpeg)
- Load the mask from disk.
Mask > Load from Disk
File Name: circle.msk
- The mask is applied to the image. Your image should look like the one shown here.
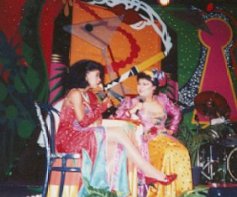
Original Image
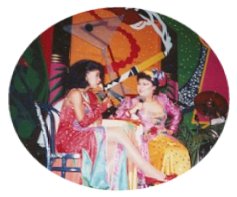
Masked Image
- Note: The mask is a circle. When the mask was applied to the rectangular image, it became an ellipse. If you want a circle, you have to create a mask specifically for the image. The next exercise will illustrate.
- If you save your file, give the file a new name. You will use pspshgrl.jpg again in the next exercise.
A Specific Mask
- Open the pspshgrl.jpg file.
File > Open
Look in: Enter the directory in which you stored your files.
File: pspshgrl.jpg
Files of Type: JPEG-JFIF Compliant (*.jpg, *.jif, *.jpeg)
- Create a new raster layer.
Layers > New Raster Layer
Name: Black Mask
Blend Mode: Normal
Opacity: 30
Group: 0
Layer is Visible: Yes
Lock Transparency: No
Mask is Enabled for the Layer: Yes
Mask is Locked with Layer: Yes
Auto Proof: Yes
- Set your foreground color to black.
Settings:
Red: 0
Green: 0
Blue: 0
- Set your background color to white.
Settings:
Red: 255
Green: 255
Blue: 255
- Select the Flood Fill tool. Set the tool options.
Settings:
Fill Style: Solid Color
Blend Mode: Normal
Paper Texture: None
Match Mode: None
Opacity: 100
Sample Merged: No
- Flood-fill the Black Mask layer with the foreground color.
- Select the Preset Shapes tool. Set the tool options.
Preset Shapes Tab Settings:
Shape Type: Circle
Style: Filled
Line Width: 1
Antialias: Yes
Create as Vector: Yes
- Using the background color (right�click and drag), draw a circle around the two women�s faces.
- Paint Shop Pro created a new vector layer. Name the new layer White Mask and set the opacity for the layer to50.
Layers > Properties
Settings:
Name: White Mask
Opacity: 50
- Adjust the position of the circle if necessary.
- Deselect.
Selections > Select None
- You should be on the White Mask layer. Set the opacity for the White Mask layer to 100.
Layers > Properties
Settings:
Opacity: 100
- Move to the Black Mask layer and set the opacity to 100
Layers > Black Mask
Layers > Properties
Settings:
Opacity: 100
- Create the mask.
Masks > New > From Image
Settings:
Source Window: This Window
Create Mask From: Source Luminance
Invert Mask Data: No
- Save the mask to the alpha channel.
Masks > Save to Alpha Channel
Available Alpha: Mask
- Delete the Black Mask layer.
Layers > Black Mask
Layers > Delete
- Delete the White Mask layer.
Layers > White Mask
Layers > Delete
- Load the mask from the alpha channel.
Mask > Load From Alpha Channel
Available Alpha: Mask
- If you save your file, give the file a new name. You will use pspshgrl.jpg again in the next exercise.
Original Image
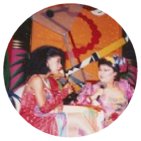
Masked Image
Fading Effect
This exercise illustrates creating a fading effect.
- Open a new file.
File > New
Settings:
Width: 200 Pixels
Height: 200 Pixels
Resolution: 72 pixels/inch
Background Color: Black
Image Type: Grayscale (8 bit)
- Set your foreground color to white. Right-click to open the recent color dialog box. Click on the color white.
- Make sure your ruler preference is set to pixels.
File > Preferences > General Program Preferences > Rulers and Units tab
Display Units: Pixels
- Make sure the view rulers option is selected.
View>Rulers
- Select the Selection tool.
Settings:
Selection Type: Square
Feather: 40
Antialias: Yes
- Place your pointer at 50 pixels across and 50 pixels down. Drag the pointer downward diagonally until you get to 150 pixels across and 150 pixels down.
- Select the Flood Fill tool.
Settings:
Fill Style: Solid Color
Blend Mode: Normal
Paper Texture: None
Match Mode: None
Opacity: 100
Sample Merged: Yes
- Flood-fill the selection with the foreground color.
- Deselect.
Selections > Select None
- Create a mask.
Masks > New > From Image
Source Window: This Window
Create Mask From: Source Luminance
Invert Mask Data: No
- View the mask.
Masks > View Masks
- Store the mask to disk.
Masks > Save to Disk
File Name: square.msk
- Close the file. Do not save the file.
File > Close
- Open pspshgrl.jpg.
File > Open
Look in: Enter the directory in which you stored your files.
File: pspshgrl.jpg
Files of Type: JPEG-JFIF Compliant (*.jpg, *.jif, *.jpeg)
- Apply the mask.
Masks > Load From Disk
- Save the file with a new name.
File > Save As
File Name: showgirl.jpg
Save as Type: JPEG-JFIF compliant (*.jpg, *.jif, *.jpeg)
- You will be prompted:
Because of the limitations of the specified file format (and possibly the save options you've selected), the saved file will be limited to a merged image. Would you like to continue? Click on Yes.
- Close the file.
File > Close
- Reopen the file so you can see the effect of the mask.
File > Open
File Name: showgirl.jpg
Original Image
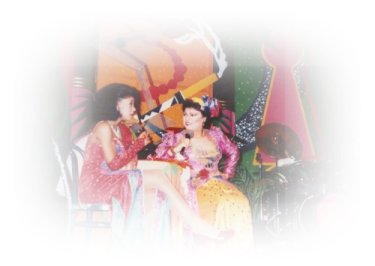
Image with a Fade Effect
No comments:
Post a Comment